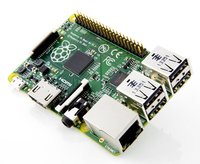
Raspberry Pi setup
 This post documents how I have set up my Raspberry Pi (model B+) for double duty as a VSCP daemon server and a pimped doorbell. This page is mostly for my own reference.
Static IP
Find the DHCP address assigned to the Raspi. Log onto the Raspi through SSH and note the current IP settings:
sudo ifconfig
Then edit the /etc/network/interfaces file.
/etc/network/interfaces
Change interface eth0 to:
#iface eth0 inet manual
iface eth0 inet static
address 192.168.1.8
netmask 255.255.255.0
network 192.168.1.0
broadcast 192.168.1.255
gateway 192.168.1.1
Reboot:
sudo reboot
As per ()this tutorial)[http://thepihut.com/blogs/raspberry-pi-tutorials/16683276-how-to-setup-a-static-ip-address-on-your-raspberry-pi]
Change hostname
sudo nano /etc/hosts
Change default hostname raspberrypi to something more descriptive:
127.0.1.1 raspi-doorbell
Edit hostname file:
sudo nano /etc/hostname
Change hostname:
raspi-satNOGS
Commit changes:
sudo /etc/init.d/hostname.sh
As per this tutorial
Update & upgrade
sudo apt-get update
sudo apt-get upgrade
Set time zone
Run the following command:
sudo tzselect
sudo raspi-config
Automount NAS file share
Created new mount destination:
mkdir /media/netwerkdrive
Added this line to /etc/fstab: //192.168.1.6/netwerkdrive /media/netwerkdrive cifs guest,uid=1000,iocharset=utf8 0 0
Mount with:
mount /media/netwerkdrive
Will automatically mount upon startup.
As per this tutorial
Share a local folder on the network
Install Samba
apt-get install samba samba-common-bin
Configure Samba
Remove password for nobody user
smbpasswd -an nobody
Added the following to /etc/samba/smb.conf:
security = user
guest account = nobody
map to guest = bad password

[fileshare]
comment=fileshare on Raspi
browseable=yes
path=/fileshare
public=yes
writable=yes
guest ok=yes
As per this tutorial
Start Samba
service samba start
TightVNC
Installed as per this tutorial.
Start at boot as per this tutorial
Fixed logon problem as per this tutorial
sudo mv /home/john/.Xauthority /home/john/.Xauthority-backup
Start Doorbell script at startup
There are loads of ways of running a command at start-up in Linux. Here we’ll create an initialisation script in /etc/init.d and register it using update-rc.d. This way the application is started and stopped automatically when the system boots / shuts down.
Create script in /etc/init.d
sudo nano /etc/init.d/startDoorbell
The following is an example based on starting up my doorbell script, but change the name of the script and the command to start and stop it, and it would work for any command.
#!/bin/sh
### BEGIN INIT INFO
# Provides:          startdoorbell
# Required-Start:    $local_fs
# Required-Stop:     $local_fs
# Default-Start:     2 3 4 5
# Default-Stop:      0 1 6
# Short-Description: Start/stop startdoorbell.sh
### END INIT INFO

### Customize this entry
# Set the USER variable to the name of the user to start tightvncserver under
export USER='pi'
### End customization required

eval cd ~$USER

case "$1" in
	start)
#   	 su $USER -c 'sh /usr/bin/startdoorbell.sh'
		sh /usr/bin/startdoorbell.sh
		echo "Starting startdoorbell.sh for $USER "
		;;
	stop)
		pkill startdoorbell
		echo "startdoorbell stopped"
		;;
	*)
		echo "Usage: /etc/init.d/startdoorbell {start|stop}"
		exit 1
		;;
esac
exit 0
Warning - its important you test your script first and make sure it doesn’t need a user to provide a response, press “y” or similar, because you may find it hangs the Raspberry Pi on boot waiting for a user (who’s not there) to do something!
Make script executable:
sudo chmod 755 /etc/init.d/startdoorbell.sh
Test starting the program:
sudo /etc/init.d/startdoorbell start
Test stopping the program:
sudo /etc/init.d/startdoorbell stop
To register your script to be run at start-up and shutdown, run the following command:
sudo update-rc.d startdoorbell defaults
Note - The header at the start is to make the script LSB compliant and provides details about the start up script and you should only need to change the name. If you want to know more about creating LSB scripts for managing services, see http://wiki.debian.org/LSBInitScripts
If you ever want to remove the script from start-up, run the following command:
sudo update-rc.d -f startdoorbell remove
As per this tutorial